Canva makes it easier to craft creative designs for your stationery projects. But can this modern tool work with vintage letterpress printing? Absolutely. We tested Canva with our letterpress printing workflow, and we were impressed with the results. This article provides a basic overview of the steps to go from a design on screen to a file we can use to generate custom letterpress plates — for the highest-quality printing.
Step 1: Make a great design
The best letterpress prints use elegant typefaces with plenty of whitespace, showing off the textured paper and deep impression. When your design is created with this in mind, you're well on your way to a beautiful print project. Canva also has templates (paid and free) that can give you a head start. For this article, we chose a free template called "White and Black Classic Wedding Invitation."
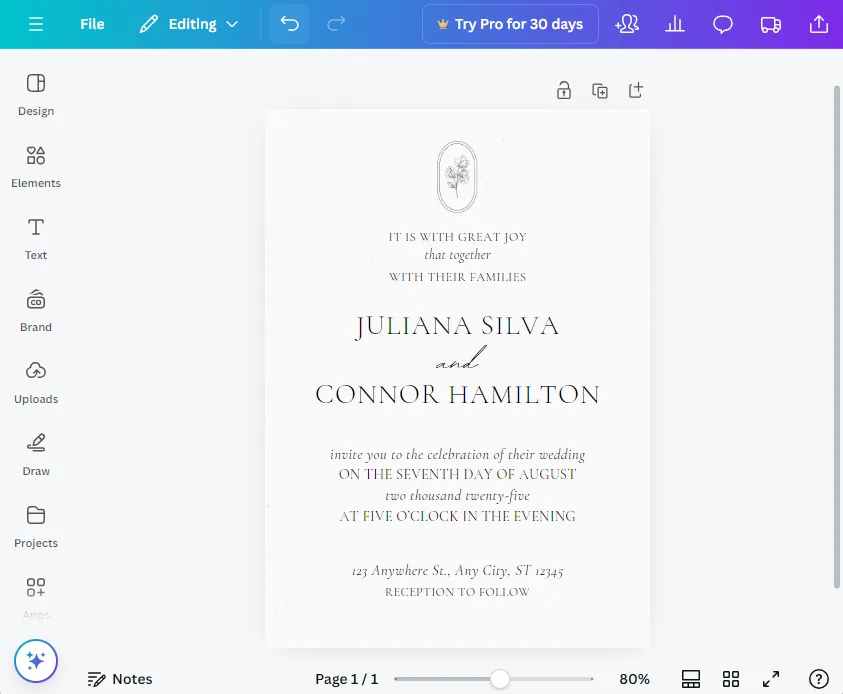
This design is pretty much ready to roll. If you wanted, you could customize the text and send this to print just how it is. Canva is advanced enough that you can use it to start a stationery design service before investing in expensive tools such as Adobe Illustrator.
Step 2: Set up for printing
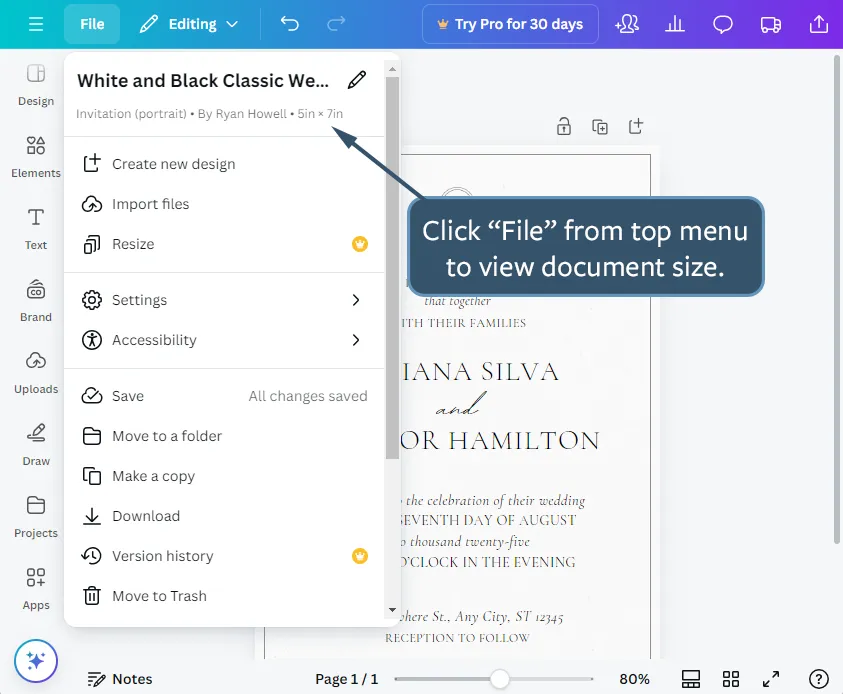
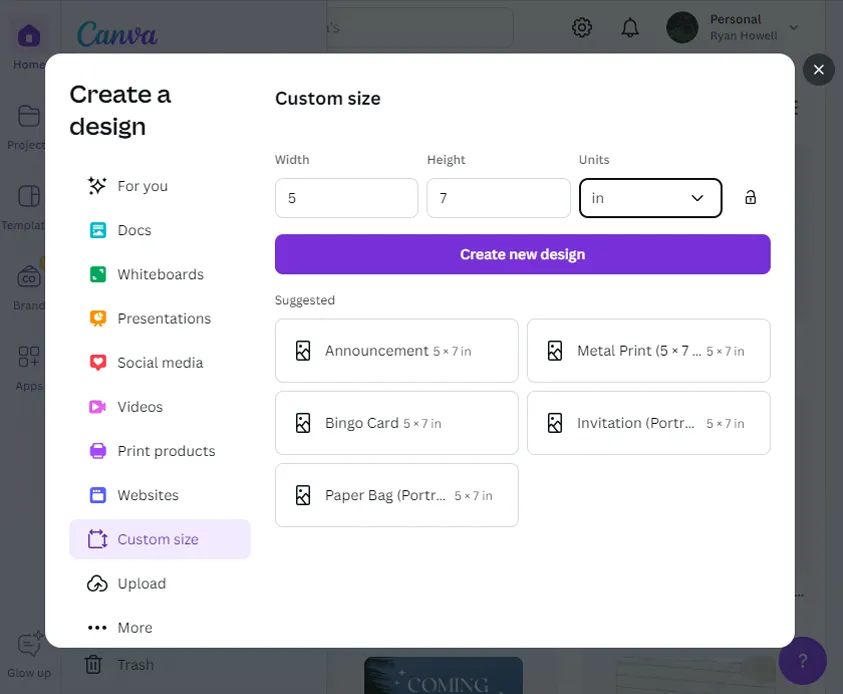
When it comes to printing, dimensions matter. For this demonstration, let's make sure our artwork is 5×7 inches — that's the size that fits into an A7 envelope. We always work backward from the envelope size. Another popular size is the A9 envelope, which holds a 5.5×8.5 inch card.
From the top of the screen, select "File." The flyout menu shows the dimension of the document. If you're creating a new design, select "Create a Design" from the home menu and choose Custom Size.
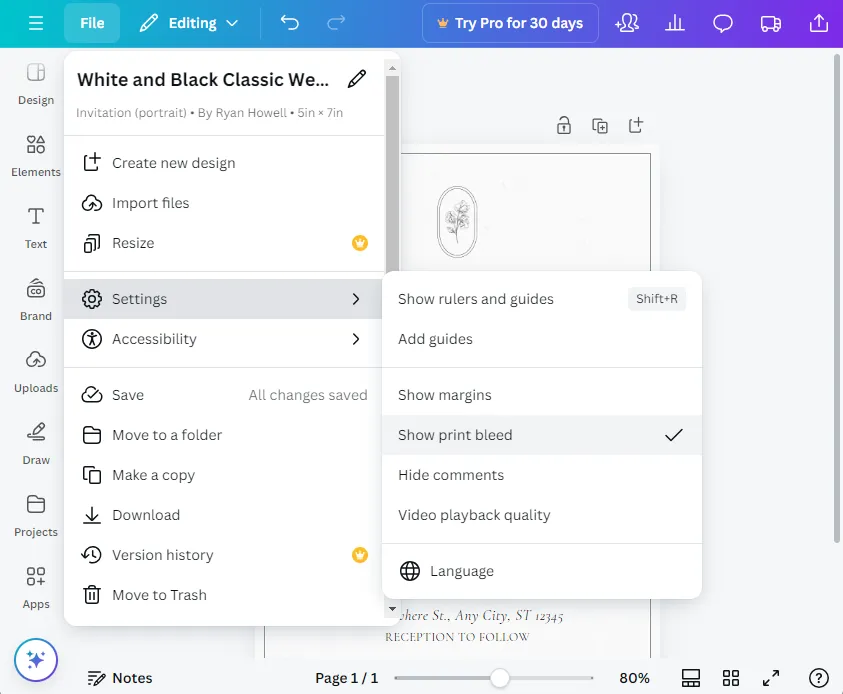
Setting up bleed
If your design runs to the edges of the paper, we print your design slightly larger than the trim size to make sure there are no gaps in the artwork. This extra area is called "bleed."
Even the free version of Canva supports a bleed zone. To turn it on, select File > Settings > Show Print Bleed. This turns on a black box around your design indicating the trim line. The area outside the box will be trimmed off in production.
If your design does not run to the edges of the paper, you can skip bleed. The bleed zone is turned off by default.
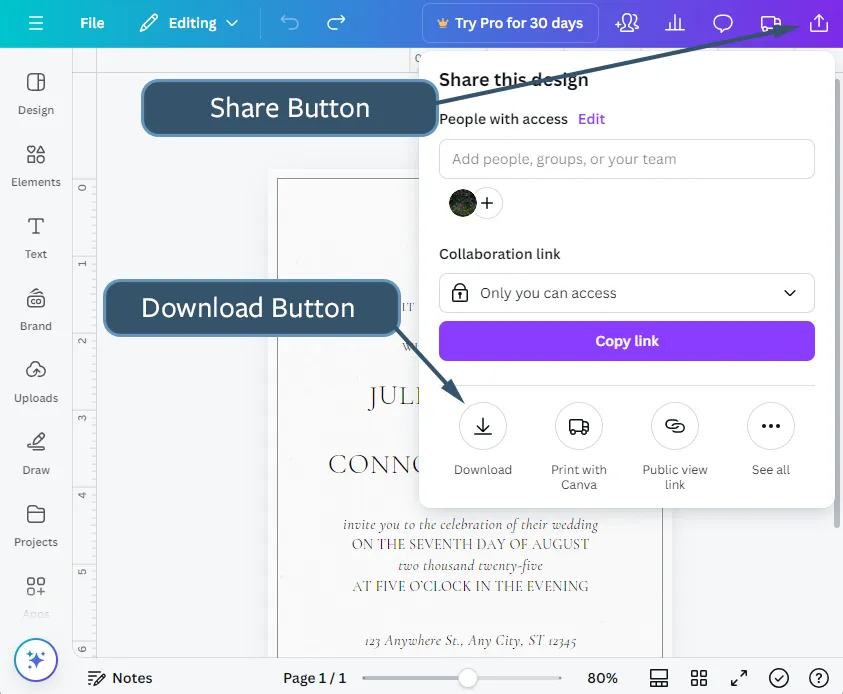
Step 3: Download your design file
Once your design is perfect, it's time to download a letterpress-printable file. From the top of the screen, select the "Share" button and choose "Download."
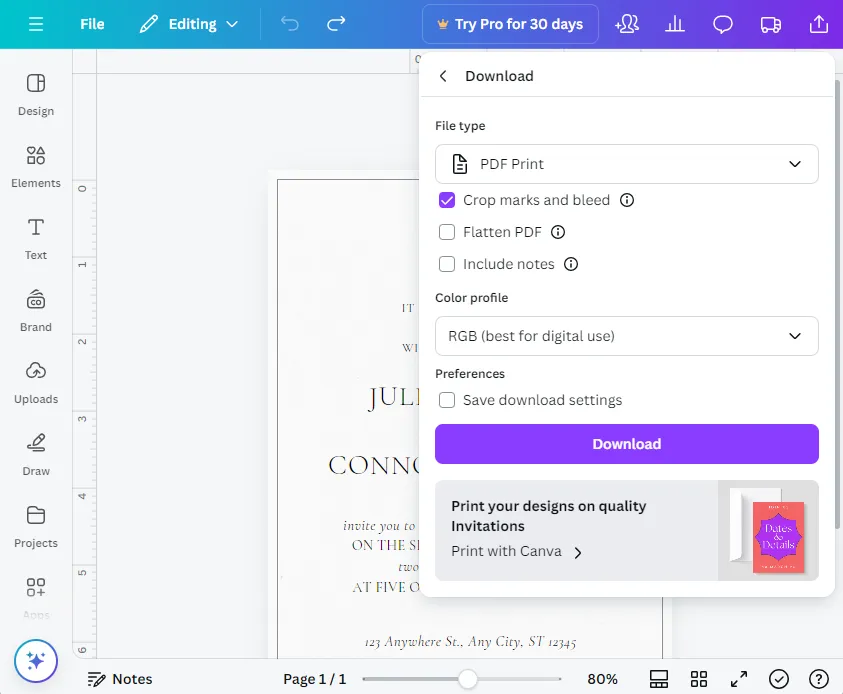
When you click the Download button, it shows the Download settings. Select "PDF Print" as the File Type, and check the box for "Crop Marks and Bleed." Do not select "Flatten PDF."
The Color Profile dropdown menu shows RGB mode. Ideally, CMYK artwork is better for letterpress, but CMYK is only available with the paid version of Canva. It's easy for us to convert in pre-press — just let us know the artwork is in RGB mode when you submit your order.
Click Download to get your PDF. These settings output your artwork as vector art, which allows us to open the design in Adobe Illustrator for any pre-press adjustments needed for letterpress plate making. Vector art is critical for this process because letterpress plates must be made at very high resolution.
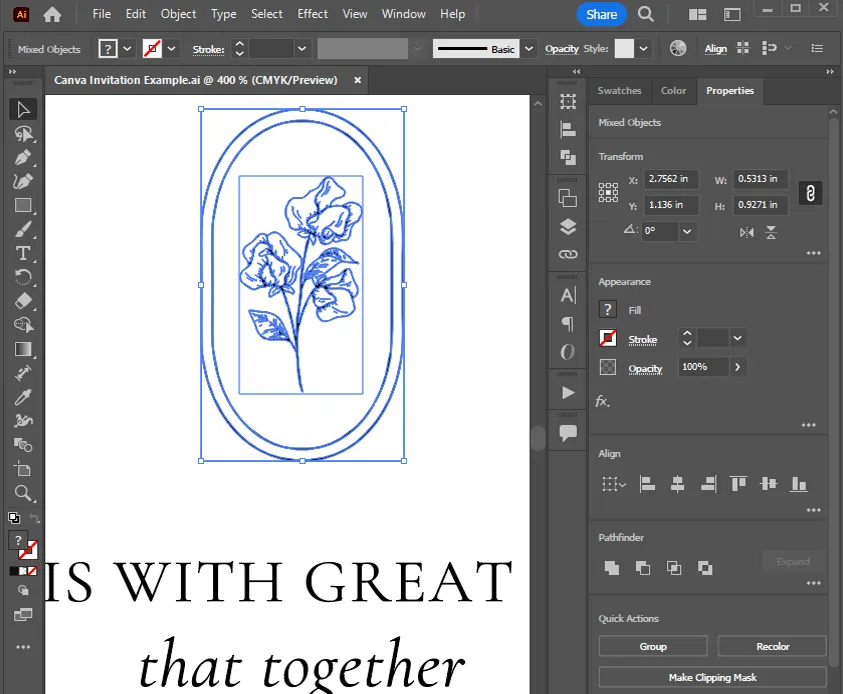
Checking for vector art
The template we tested included a vector illustration from a free collection of botanical line drawings in Canva. If your artwork is not in vector format, we may need to adjust it for you. Generally, if you can zoom in on text or artwork and it does not become pixelated, it's probably vector format.
From here, we use specialized equipment to turn your design into a raised letterpress plate. The plate is then mounted on our vintage letterpress printing presses, and we carefully adjust the press to print your design as crisply and cleanly as possible with a deep letterpress impression.
Final tips for printing Canva designs with letterpress
Canva offers many useful tools for print design, including bleed, crop marks, and vector output in PDF format. It's light on vector drawing tools, but it does allow you to position and resize vector artwork from the template library.
Do a print proof before sending
With any print design, we recommend doing a print proofing phase before sending to us. Print it out on your home printer with crop marks, trim it with an X-Acto knife, and make sure everything looks right in physical form. Words that look large on screen may look very small when printed and trimmed. Share the proof with others to check for any spelling errors.
When you send us a design, that's just the first step. We review each design for printability, flag any potential issues, and recommend adjustments in a PDF proofing stage before making your custom letterpress plates. If you have any questions or need help with file setup, contact us and we'll be glad to help.